
Step 1: Navigate to Email Services
- Log in to your Growth Suite account.
- From the left-hand menu, click Settings.
- Select Email Services.
- Click Create Dedicated Domain.
Step 2: Create Your Subdomain
Create a subdomain such as:sc.yourdomain.com
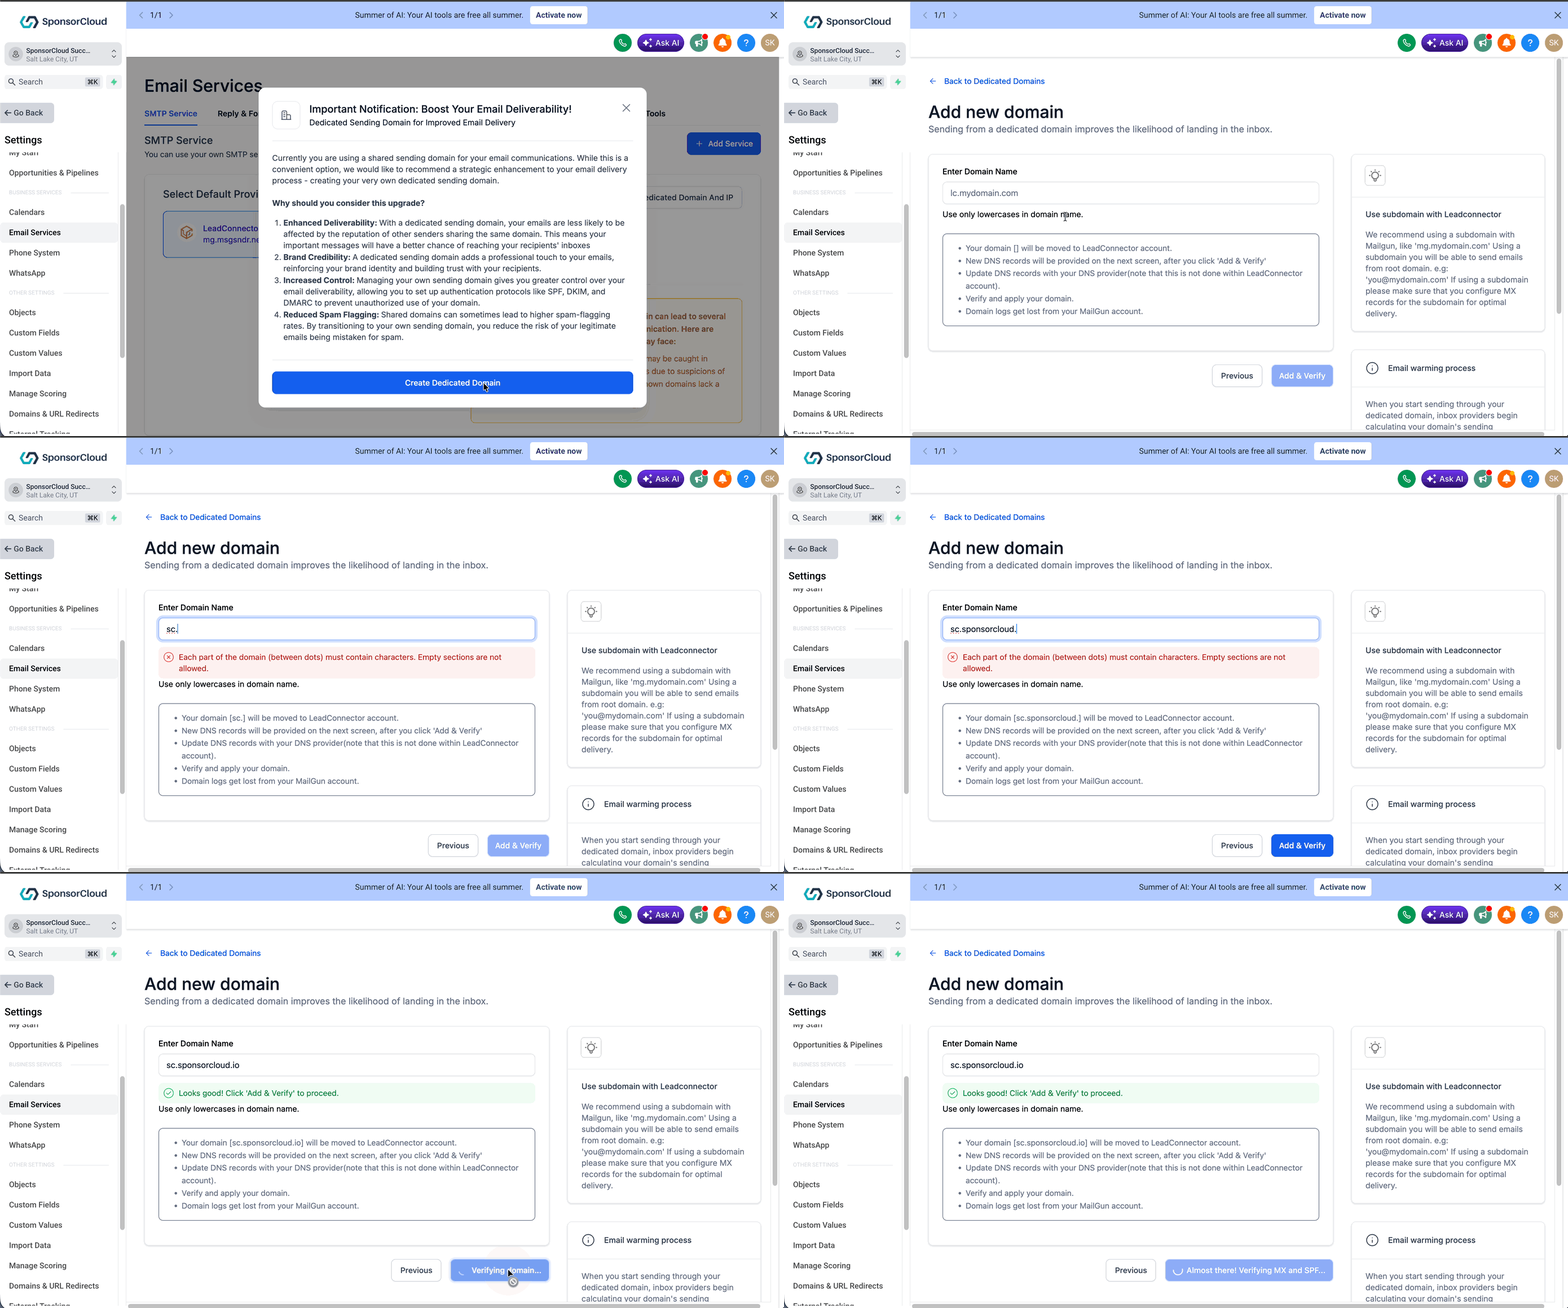
Step 3: Add DNS Records
Growth Suite will generate the DNS records required for domain authentication.
Option A: Automatic DNS Setup (Recommended)
If your domain is hosted with:
- Cloudflare
- GoDaddy
You can simply click Authorize Domain.
Growth Suite will automatically add the necessary DNS records to your DNS provider. You only need to grant permission for the connection.
Option B: Manual DNS Setup
If your domain is hosted with another provider:
- Copy the DNS records displayed by Growth Suite.
- Log in to your domain provider.
- Add each DNS record exactly as shown.
- Save the changes.
Note: DNS propagation may take a few minutes to several hours depending on your domain provider.
Step 4: Verify the Domain
After the DNS records have been added:
- Return to Settings → Email Services.
- Click Verify Records.
Once verification is successful, the status of your domain will display:
- SSL Issued ✅
A green checkmark next to the subdomain indicates that the domain has been successfully authenticated and is ready to use.
Step 5: Configure Email Headers
After the domain has been verified:
- Locate your subdomain in the Email Services page.
- Click the three dots (⋮) beside the subdomain.
- Select Set Headers.
Configure the Following:
From Name
Enter the name recipients should see when receiving emails.
Example:
- ABC Capital
- John Smith
- Investor Relations Team
From Email
Enter the email address that will be used to send emails.
Example:
Save your changes.Your Dedicated Email Domain Is Ready
Once the domain shows SSL Issued with a green checkmark and the headers have been configured, you can begin sending emails from Growth Suite using your branded email address.
Need Help?
If the domain does not verify successfully, ensure that:
- All DNS records have been entered correctly.
- DNS propagation has completed.
- Your DNS provider supports the required records.
After making any changes, click Verify Records again.