
Overview
The Documents section within an offering gives sponsors complete control over how documents are organized and shared. Using the Document Manager, sponsors can create folders, organize documents with an intuitive drag-and-drop interface, and configure visibility settings at both the folder and document levels. This makes it easy to maintain a clean, well-organized document library while ensuring investors only have access to the documents intended for them.
Create a Folder
To organize your documents, you can create folders within the Documents section.
Insert GIF here
- Navigate to Portfolio > Offering > Offering Details, then select Documents from the left navigation panel.
- Click Add Folder, enter a folder name, and choose the folder's visibility.
- Click Create Folder.
Note: For more information about visibility settings, see the Document Visibility section below.
Upload Documents
You can upload documents directly to an offering or into a specific folder.
Ins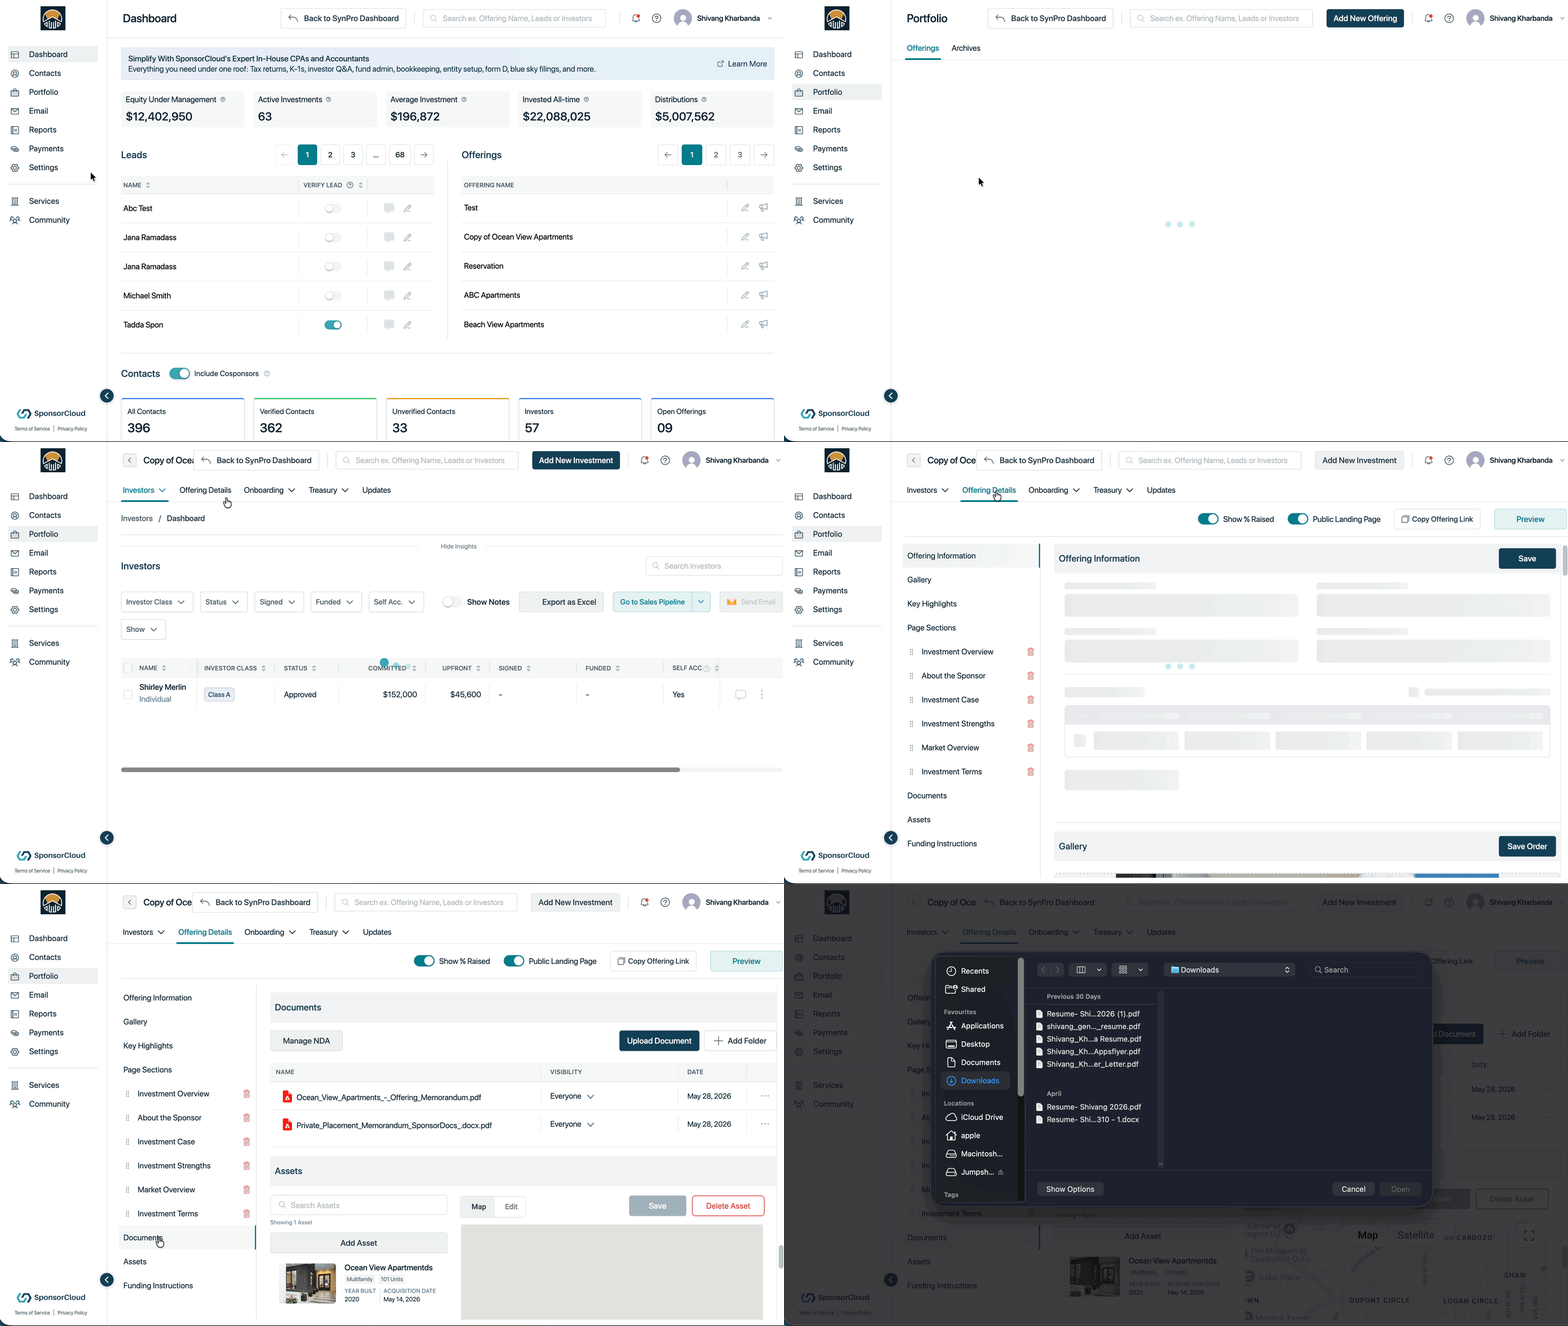
- Navigate to Portfolio > Offering > Offering Details, then select Documents from the left navigation panel.
- Click Upload Documents and select up to 10 files from your computer.
- (Optional) Select a destination folder. You can choose one of your existing folders from the drop-down, create a new folder directly from the drop-down, or leave No Folder selected to upload the documents without placing them in a folder
Tip: Upload up to 10 documents at a time. Repeat the upload process to add more. Each document can have its own folder and visibility settings.
Note: CSV files do not support previews. Supported formats like PDFs can be previewed within the investor platform
Move and Organize Documents
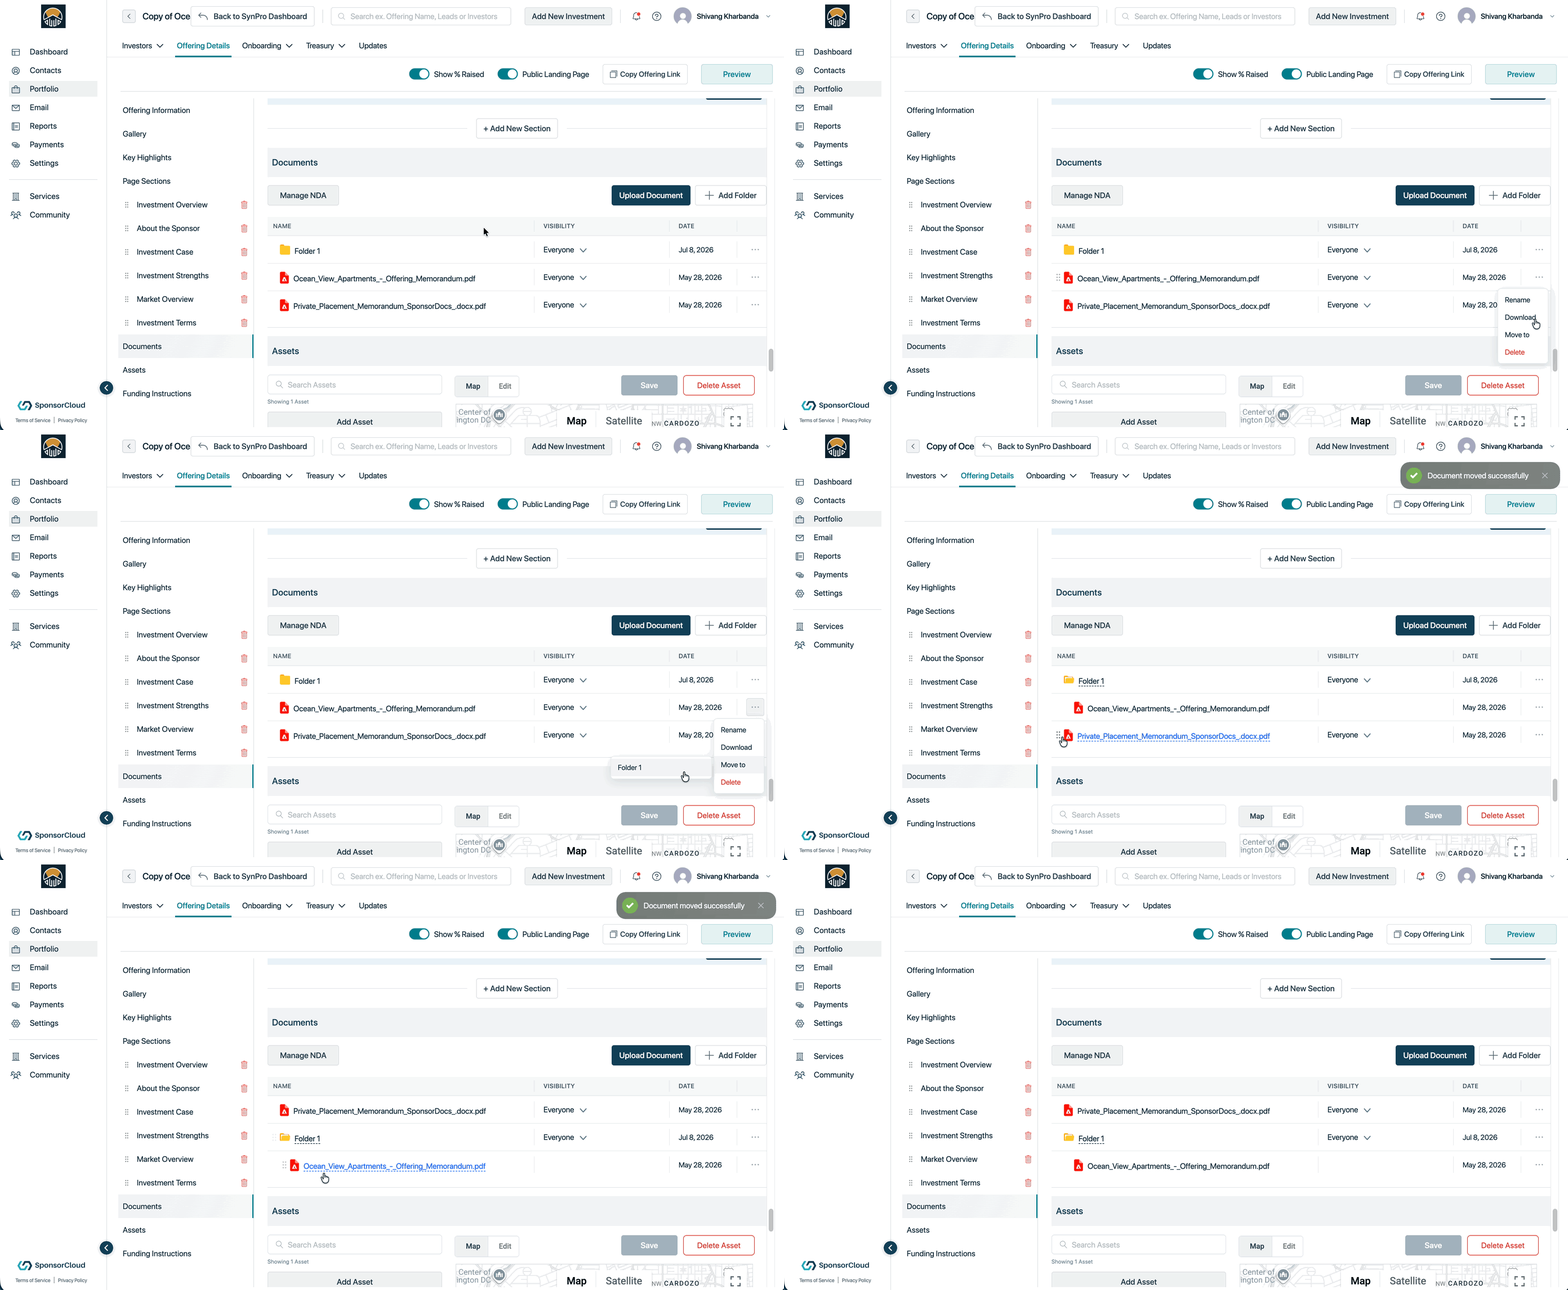
Follow these steps to move documents into folders and keep your documents organized:
- Navigate to the Documents section.
- Select the document(s) you want to organize and move them to a folder using one of the following methods:
Method 1: Move Using the Document Options
- Click the three dots (⋮) next to the document.
- Select Move To.
- Choose the desired folder from the list.
Method 2: Drag and Drop
- Click and hold the document you want to move.
- Drag and drop the document into the desired folder.
Your documents will be moved to the selected folder and organized accordingly.
Document-Level Visibility
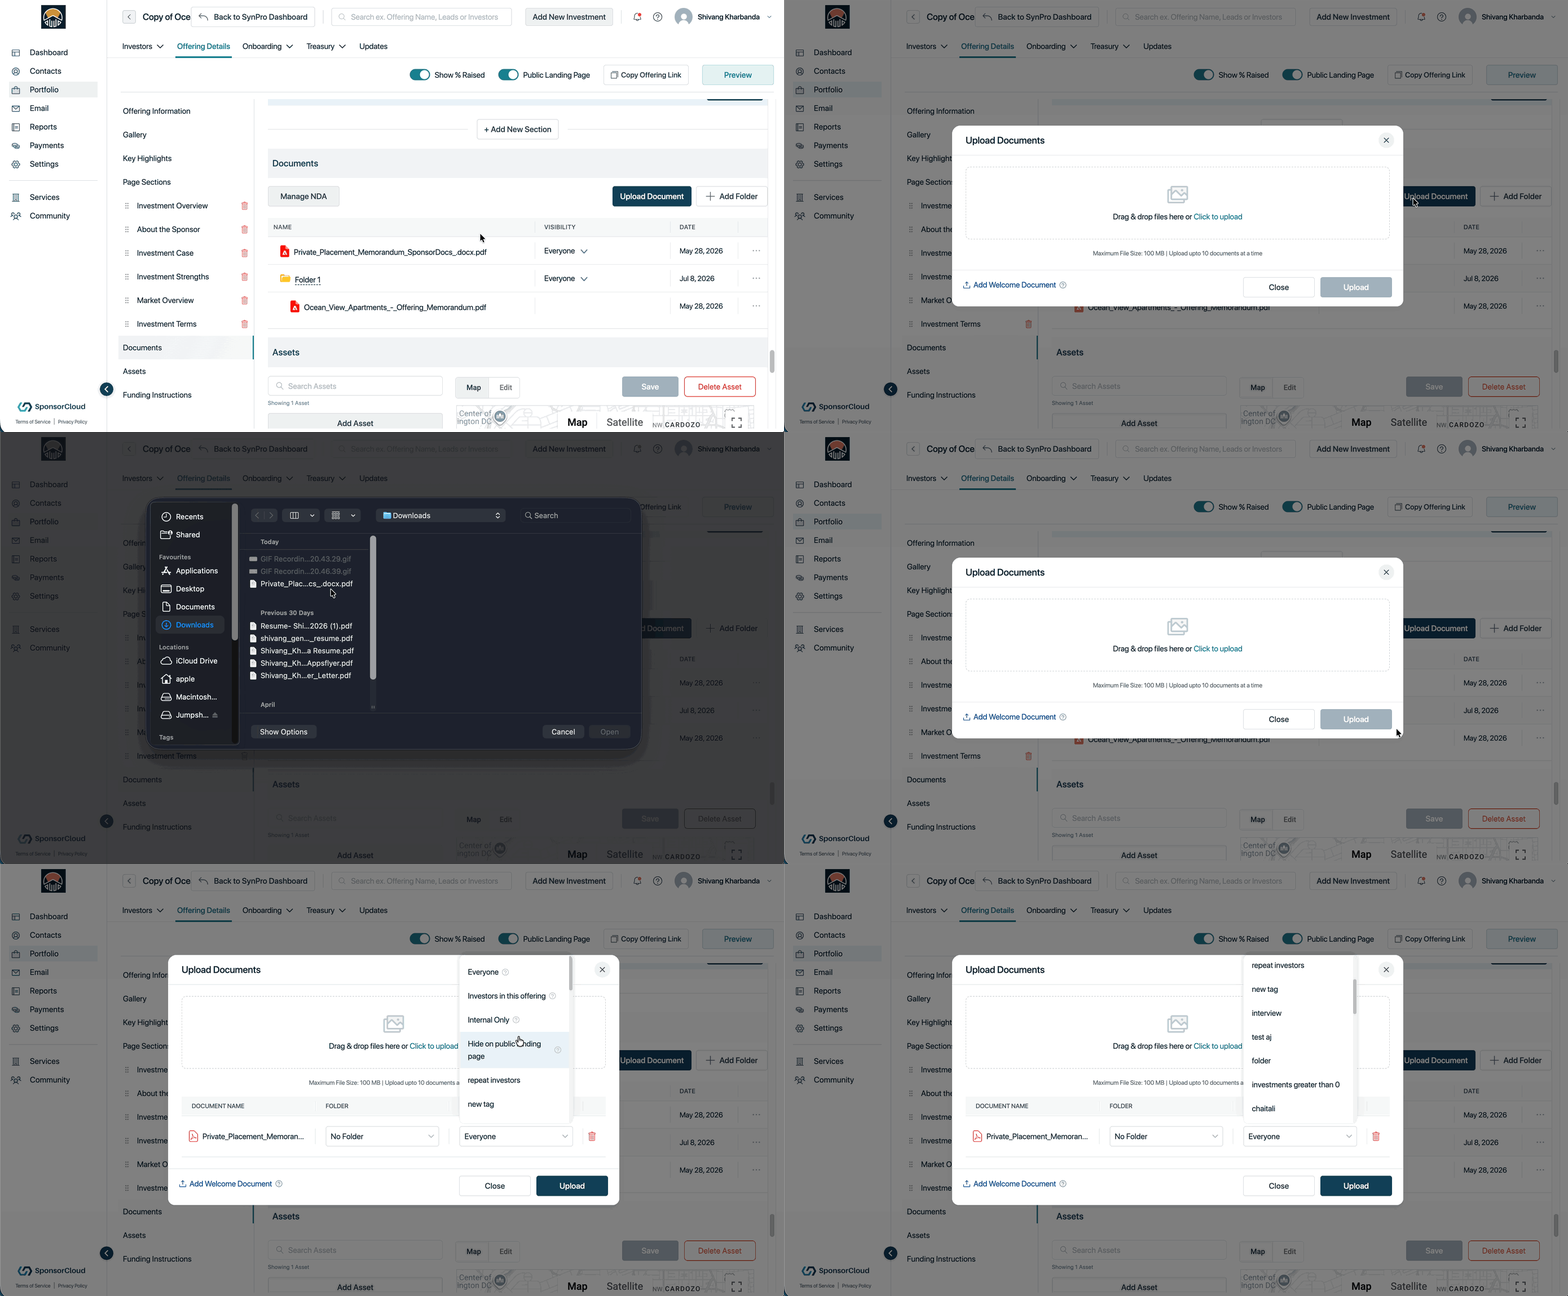
Visibility is managed at the individual document or folder level, giving sponsors control over which documents are visible to investors.
Visibility can be configured both during uploading of a document or post upload from Documents section.
Both system-defined and custom visibility tags are supported.
System defined Visibility settings
|
Everyone |
Anyone who can view this offering |
|
Investors in This Offering |
Contacts with an approved investment in this offering |
|
Internal Only |
Only company users can view this |
|
Hide on Public Landing Page |
Hidden on the public landing page but visible in the portal |
For more information on using Custom Visibility Tags, click here to learn how to add and manage tags.
Rename Documents
You can rename documents directly from the Documents section.
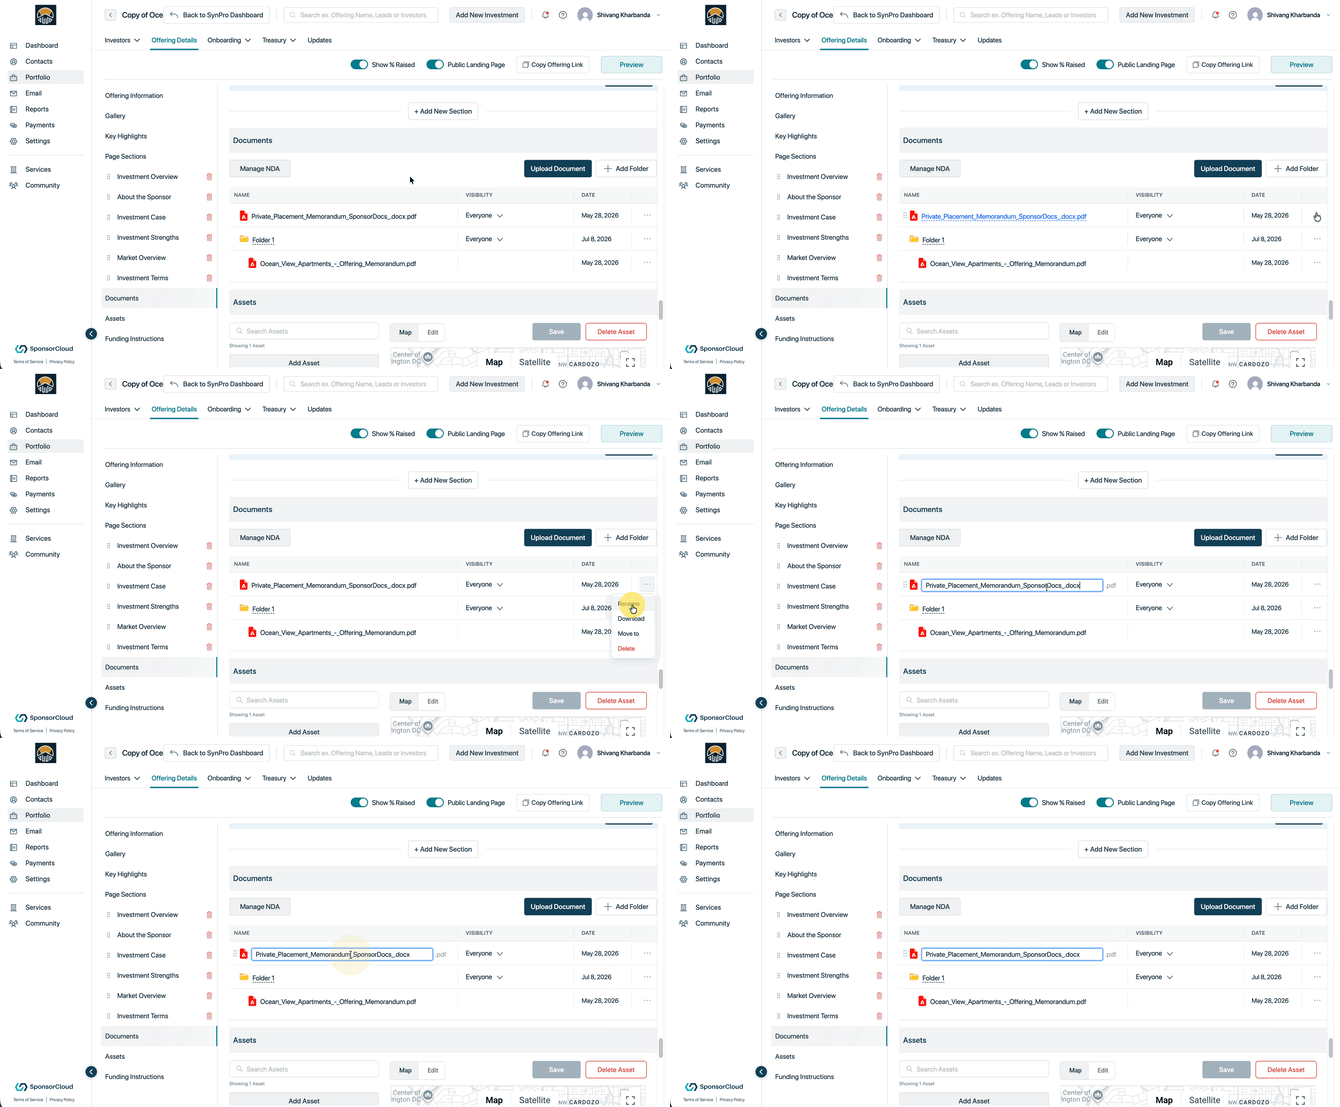
Follow these steps:
- Navigate to the Documents section.
- Click the three dots (⋮) next to the document you want to rename.
- Select Rename, update the document name, and save the changes.
The document will now appear with the updated name.
Preview the Investor Experience
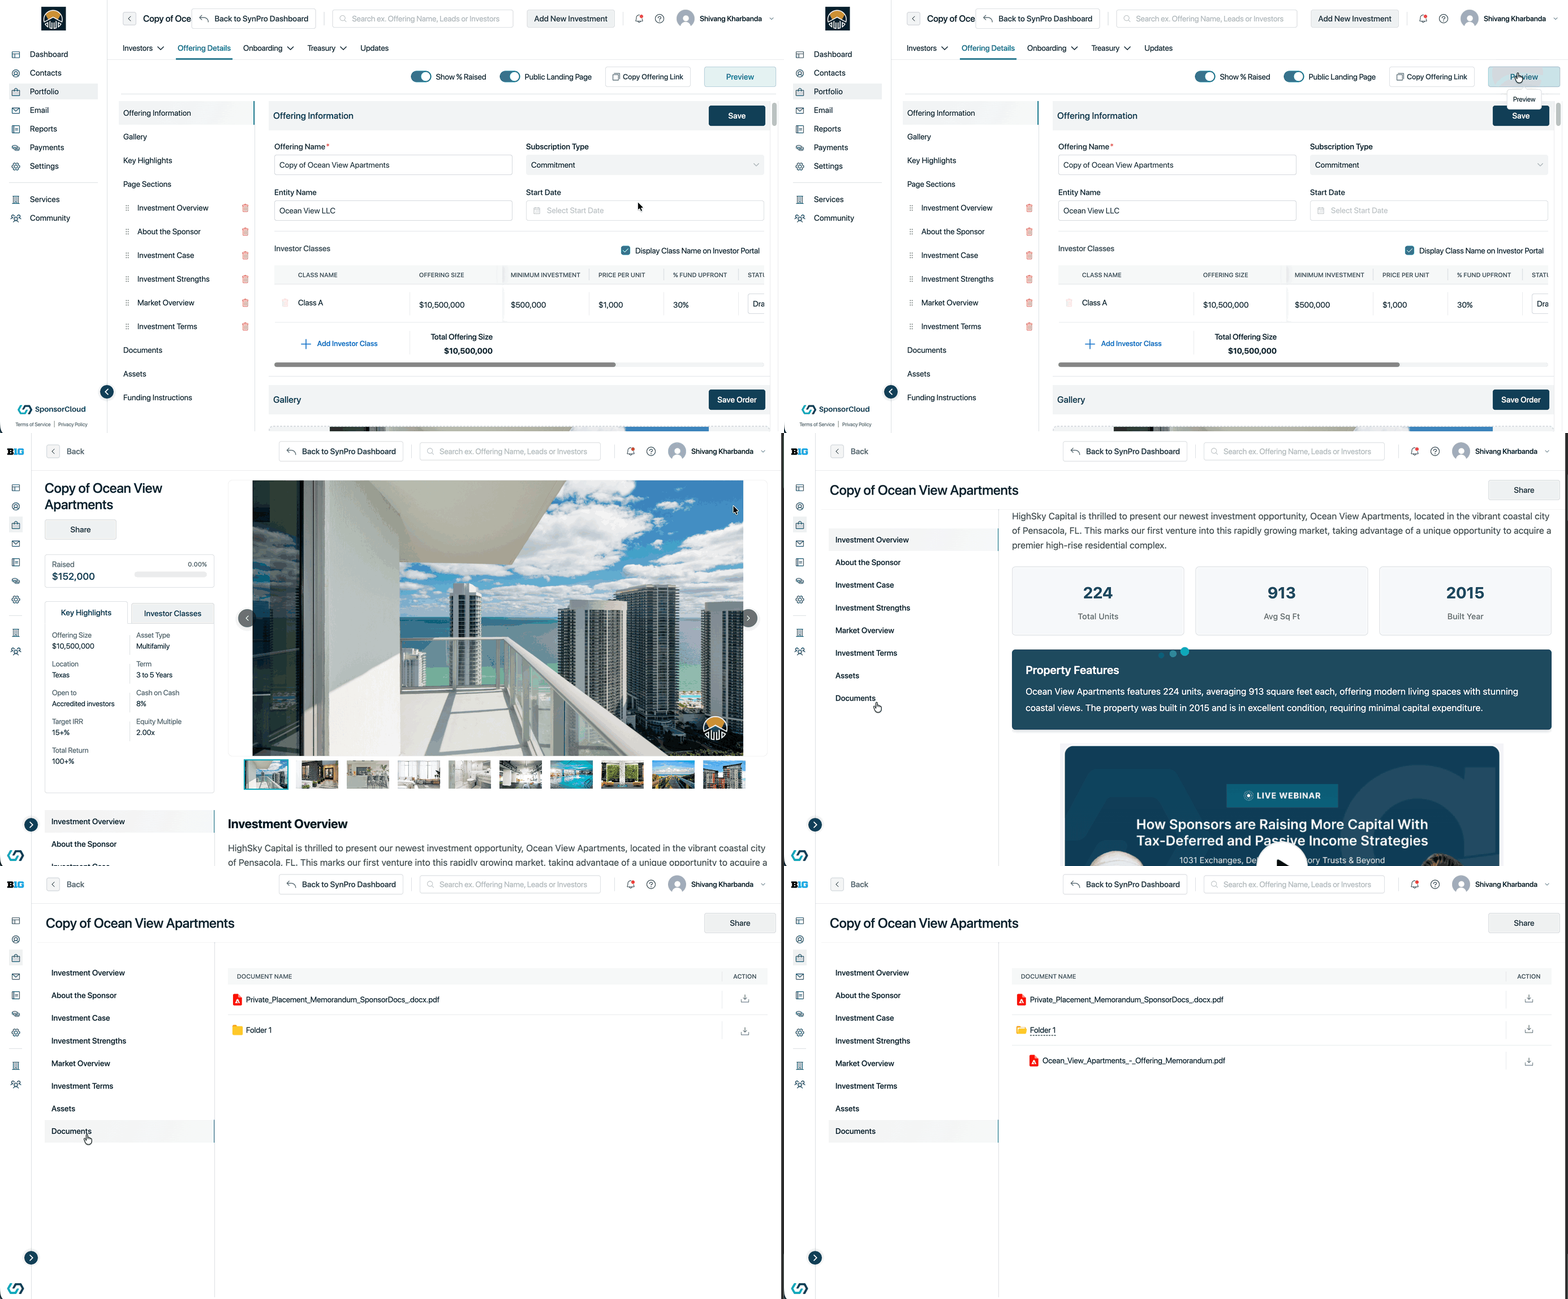
Investor Document Experience
Sponsors can preview the landing page and see exactly how the Documents section will appear on the public landing page before publishing.
Documents marked as Internal Only are excluded from the investor view, while documents with investor-facing visibility remain accessible.
Investors can:
- Browse folders and documents
- Preview supported files directly on the platform before downloading
- Download individual documents
- Download an entire folder, packaged using the folder name